
Changing the Body Map / Schematic
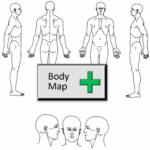
In Spinalogic Imaging, you can add a body map (aka body schematic) to the image set for a patient.
Here’s how to change the default image if you want to use your own.
**WARNING** You’re going to be editing some files deep in Spinalogic. If you are not comfortable doing this, get someone else to do it for you.
The template file
Each time you add a new body map, Spinalogic just takes a copy of the master template file. To change the one used for future new body maps, you just need to change this master file. This will not affect any body maps that have already been created.
Go to the spinalogic directory on your server, the one with all your data in it. Then go to the images folder. The file you’re looking for is called SchematicDefault.png. It’ll be in a location like C:\Spinalogic\Images\SchematicDefault.png.
Rename it to SchematicDefault.orig.png in case you want to change it back later.
Create your new template file
Create the new body map template file using your drawing program. You need to save it as a .png file. The final version you use must be called SchematicDefault.png.
Copy your new template file
Copy your new template file to the spinalogic/images folder.
Test the result
Open a patient’s image set, click the ‘+ Body Map’ button.

