

Broadcast Statements
It’s easy to send a statement to all your patients in a single batch. This is especially useful for patients paying with any of the automated methods, since they typically don’t get receipted at each visit.
We recommend sending them once per month on the first business day for the previous calendar month. This is easy to manage and quite sufficient for most patient purposes.
Start by going to Admin..Broadcast..Statements. You’ll see something like this:
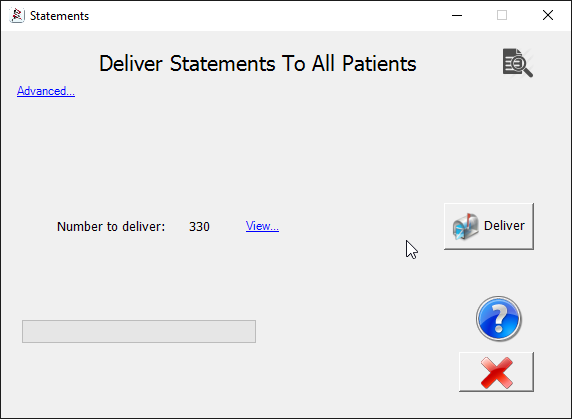
By default when you open the form, it selects all patients who have insurance-claimable items that have not yet been put on a statement that are dated up to the end of the previous calendar month. You can change those options by clicking the ‘Advanced…’ link, but mostly they are fine so you can just click ‘Deliver’ and be done! In this case you can see there will be 330 emails sent.
Details
If you click the ‘Advanced…’ link you’ll see something link this:
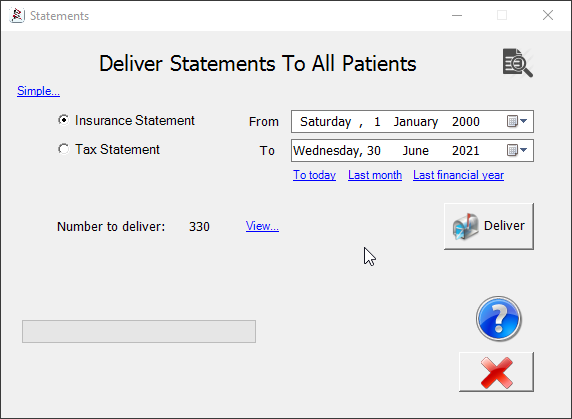
Simple… / Advanced… Click to toggle between simple and advanced modes.
Insurance / Tax Statement You can send either one of these in a batch. To understand the differences, see Issuing Statements.
From / To Set the date range for ledgers to include. You can see that by default From is set to a long time ago to include any item that is claimable and has not been put on a statement yet. This is to ensure you include items that we paid in a different month to when they were billed.
To today / Last month / Last financial year Quick links to set the date range to one of those three presets.
Number to deliver The number of emails that will be delivered. Insurance statements are issued by family so the count is a total of all families who have at least one member with an un-issued claim item. For Tax statements, the emails are per individual.
View… See a list of the families or patients who will be emailed.
Deliver Button Click to start the delivery process. Delivery will be done by your transactional email server. If you use ours, you get full end-to-end tracking of delivery. If the patient has no email address for statement delivery or they have ‘Deliver Statements’ unchecked in their family preferences, the statement will be attached to the patients documents and tagged to print out on patient arrival. In that case, the status below will show as ‘Other’.
After delivery
Once the statements have been delivered, you can see the result looking something like this:
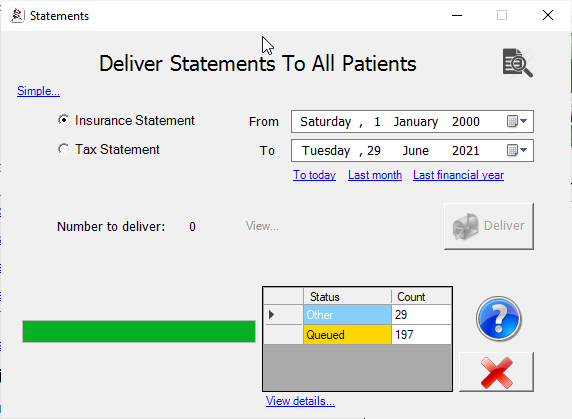
You can the the results of the send. Click ‘View details…’ for full send details on the batch and each item.
You can see the meaning of the status here. Note that the status will not update in this view in real time past ‘Queued’ but will when you click through to the detail view.

