

Appointment Types – In Detail
Getting your Appointment Types set right is the centre of efficient practice flow. Recommendations:
- Go through each Appointment Type in detail
- Don’t have more Appointment Types than you need
- Name them sensibly – start related ones with the same root so they group together e.g. ‘Adjustment – Child’ and ‘Adjustment’ NOT ‘Child Adjustment’ and ‘Adjustment.
Open the settings from the main menu. You will need to have the right security privileges to access:
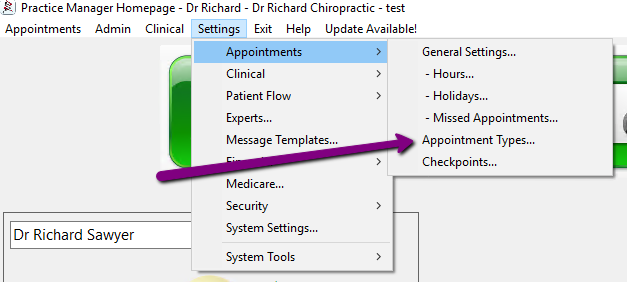
You’ll see the Appointment Type settings:
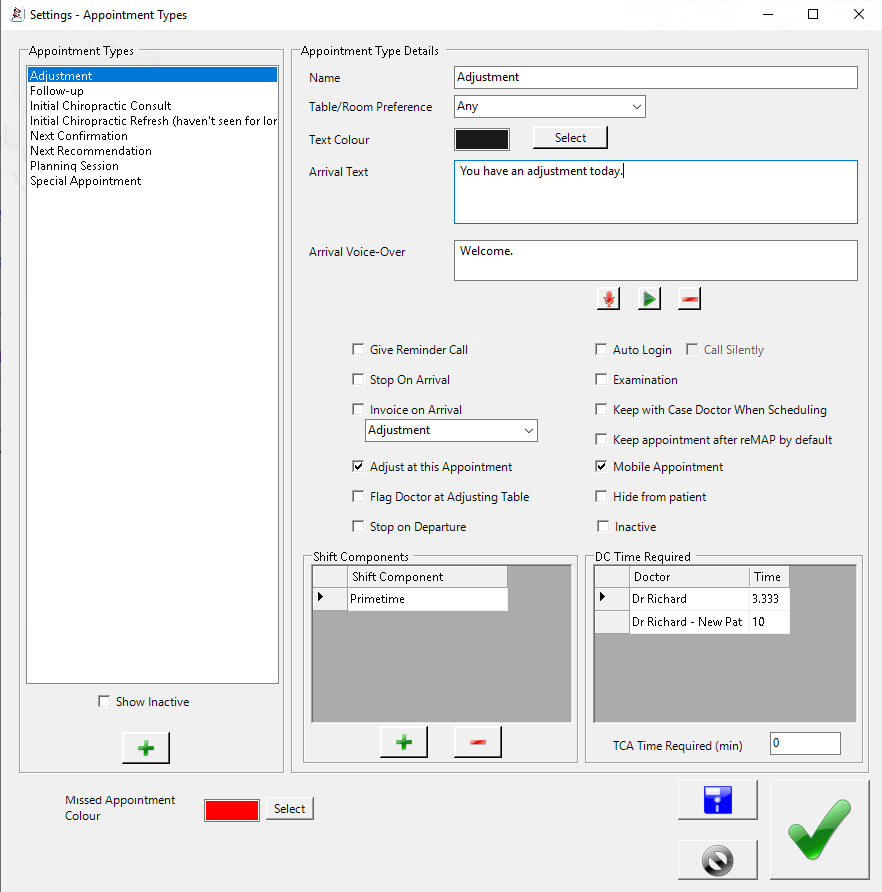
Select the Appointment Type from the list on the left. By default, inactive ones are hidden. Check ‘Show Inactive’ if you want to see those.
Name: The name of the appointment as it will show on your book and in the patient’s calendar.
Table/Room Preference: Use this to ensure appointments of
a particular type can only be called to that location.
Text Colour: The color of the text of this appointment in the book, patient calendar and other appointment lists. Generally you should choose solid/dark colours so they will contrast clearly against various light/pastel background system colours.
Arrrival Text: The text that will show on the screen to the patient when they arrive for their appointment. The same text will show to the CA if they manually arrive the patient.
Arrival Voice-Over: The audio that will play to the patient when they arrive. Type in your script and record it.
Give Reminder Call: If checked, appointments of this type will show in the Reminder Call list so you can call, send an email or sms to remind the patient.
Stop On Arrival: If checked, the patient will not be called as soon as they arrive, rather they will go to the Arrival Stop queue. Use to manage special appointments. These appointments will also show in the sub-goal list for Solo CA and In CA.
Invoice On Arrival: Check to add an invoice item to a patient’s ledger automatically when they arrive. DON’T use this for the item a patient is automatically billed for when they get adjusted or you will get duplicate billing!. Use instead for other items, like examination fees, special therapist fees etc.
Adjust at this Appointment: Check if you load this patient up on the table and deliver a paid service (typically an adjustment). Checking it has two effects: 1. this item is used when calculating the total value of a care plan in care plan settings, 2. if the patient is loaded on the table, they will be billed the usual fee. If not checked, the patient will not be billed even if they are loaded on the table and an adjustment recorded.
Flag Doctor at Adjusting Table: If checked, this appointment will show in the doctor’s sub-goal list and also have the name highlit in a ‘plum’ colour on the adjusting screen.
Stop on Departure: If checked, this appointment will generate a departure stop after recording the adjustment thus notifying the Reception that some post-adjustment action needs to be taken. The appointment will also show in the SoloCA and Out CA sub-goal lists so they can be prepared.
Auto Login: If checked, the patient record will be opened immediately after they are called without the patient having to press any button.
Call Silently: If checked, the calling will make no sound.
Examination: If checked, this item is used to check if a patient has any further examinations in the Tech CA homepage. It has no other effect if you don’t log in as Tech CA.
Keep with Case Doctor When Scheduling: When mapping a care program, if the preferred time is not available, the scheduling engine looks forward in time until it finds a suitable space based on the availability settings. Sometimes the next suitable space may be with a different doctor. If this box is checked, the appointment will only be made with the patient’s Case Doctor.
Keep appointment after reMAP by default: When remapping, the default is to delete all appointments within the care plan start and end dates. If you want appointments of this type to remain by default, check this box. you can override it at re-map time. Typical use is with massage, special appointments that are not part of a care plan.
Mobile Appointment: Use for ‘Loose Scheduling’ style of booking. In this scenario, if a patient arrives and has no appointment, Arrivals looks for their last missed appointment and arrives them for that instead. If there is none, it looks forward up to 7 days and arrives them for the next scheduled appointment. More information here.
Hide from Patient: Check for appointment types you don’t need to patient to be aware of like ‘Follow Up’ or ‘Needs Review’. Such appointments then don’t show in:
- Patient calendar that you print or email for the patient
- ‘Next Appointment’ on the patients file, in the receipt or payment/sale form
- Reminder Calls list
- Volume stats on the appointment book
Of course, they do still show in the appointment book.
Inactive: Check for appointment types you no longer need.
Shift Components: These are the Shift Components that this appointment can be scheduled into. This, in combination with the practitioner hours settings, is how you set where different appointment types can go into your book.
DC Time Required: The amount of time that the appointment will take for each doctor. Note that this setting does *not* determine which appointments can book with who.
TCA Time Required: Spinalogic maintains a ‘shadow’ appointment book for the Technical CA based on this time. If set greater than zero, the scheduling engine will ensure the TCA doesn’t get over booked. You can see these appointments in the appointment book by selecting the radio button under ‘Show Doctor / TCA’
Missed appointment color: The background colour to use for missed appointments on the calendar.
Primary adjustment: The default appointment type used in:
- Care Program template generation
- Ad-hoc appointment booking
- Manually loaded adjustments

